August 8, 2010

Crispy Salted Oatmeal White Chocolate Cookies


These cookies fit perfectly with the sweet and salty trend making its way through grocery stores (tried those yummy Nature Valley granola bars?), restaurants (we've heard of chocolate bacon), and blogs (these cookies!). We adapted a recipe found on PickyCook, a well-organized blog with a huge range of culinary ideas.

Crispy Salted Oatmeal White Chocolate Cookies
(the name is quite a mouthful...)
1 cup all-purpose flour
3/4 teaspoon baking powder
1/2 teaspoon baking soda
1/2 teaspoon salt
14 tablespoons butter, softened but still cool --> this works out to about 3/4 cup + 1/8 cup
1 cup granulated sugar
1/4 cup brown sugar, packed
1 egg
1 1/2 teaspoons vanilla extract (we put in about 2 teaspoons)
2 1/2 cups old-fashioned rolled oats --> do not use instant or quick-cooking oatmeal!
1 cup white chocolate chips
Flaky sea salt
  • Stir together flour, baking powder, baking soda, and salt in a small bowl.
  • In a large bowl, beat butter and sugars for about 20 seconds. Increase mixer speed and beat for a minute longer, until light and fluffy. Scrape down the sides of the bowl before adding egg and vanilla to the mixture. Beat until well-combined. Scrape the sides of the bowl again.
  • Add flour mixture into the large bowl, mixing on low speed until just combined. Slowly add oats and mix well.
  • Add white chocolate. We found it easiest to stir with a wooden spoon, but you can mix for a few seconds if you would like.
  • Form dough into balls between 1 and 2 tablespoons each.
  • Line baking sheets with parchment paper or silpat... We'd used our silpat (ours is Patisse brand) mat to roll out cookies on the counter before, but we had no idea it could go in the oven. Very cool! And the cookies really don't stick.
  • Place cookies on baking sheets, leaving an inch or two between each one so they have room to spread.
  • Use your hand to flatten the dough balls so they are 3/4-inch thick. Sprinkle with sea salt.
  • Bake in preheated 350 F oven until cookies are golden brown and edges are starting to crisp - 13 - 16 minutes. We let ours bake for 15 minutes, which left the centers a bit chewy. Let the cookies cool a little bit before transferring to a wire rack.
Combining the wet and dry ingredients.

The original recipe called for a chopped-up white chocolate bar.
Chocolate chips are a little bit easier, but we're sure the chocolate
bar would be decadent!

Dough is done, pan is prepared, oven is on.

Sprinkling the salt.


August 7, 2010

Ginger-Honey Glazed Salmon

We love going through magazines to find recipe gems, but Oprah sometimes serves up complicated ingredient lists. This simple salmon recipe, found in the January 2006 magazine and on the Oprah website, has surprisingly few ingredients.

Salmon is a very good source of protein and omega-3 essential fatty acids (which are one of the reasons some fish are called "brain food"). Improved cardiovascular health is often touted as another bonus of this fish. On the Whole Foods website it's suggested that salmon consumption can lower hostility, decreasing grumpiness.

Ginger-Honey Glazed Salmon
1/2 cup orange juice
1/4 cup soy sauce
2 tablespoons fresh ginger
2 tablespoons honey
1 teaspoon sesame oil (we used olive oil)
1 fillet salmon
2 tablespoons olive oil
  • In a small pot, bring orange juice, soy sauce, ginger, honey, and sesame oil to a simmer. Cook for 5 minutes on medium-low heat.
  • Pour half of the marinade into a shallow dish and let cool for a few minutes. Put the fish in the dish, coating with the marinade. Turn the skin side up and cover with plastic. Set the salmon aside for 10 minutes
  • Heat olive oil in frying pan over medium-high heat. Cook fish with skin side down, covered, for 3 minutes. Skin should be crisp. Flip the fish and cook for another few minutes until cooked through.
Our mini honey jar - the perfect size for this recipe.

We store ginger in a plastic bag in our freezer.

Salmon frying. Feel free to use packaged cut filets.

August 4, 2010

Chocolate Caramel Thumbprints

Lisa has been itching to make these for ages. They're out of one of our favorite cookbooks, Better Homes and Gardens: The Ultimate Cookie Book (edited by Lois White, 2007) and can also be found online. You should see our copy of the cookbook: there are purple post-it notes sticking out all over the place, marking recipes we just have to try!

These cookies are chockfull of pecans, so take this into account when sharing with others. We don't recommend omitting the nuts though, because they help to hold the cookie together.

Chocolate Caramel Thumbprints
1 egg
1/2 cup butter, softened
2/3 cup sugar
2 tablespoons milk
1 teaspoon vanilla
1 cup all-purpose flour
1/3 cup unsweetened cocoa powder
1/4 teaspoon salt
16 vanilla caramels (we used regular caramels)
3 tablespoons whipping cream
1 1/4 cups finely chopped pecans
1/2 cup semisweet chocolate chips
1 teaspoon shortening
  • In a large mixing bowl, beat butter for 30 seconds. Add sugar and beat well. Then add egg yolk, milk, and vanilla (make sure to put the egg white in the fridge, because you won't need to use it for about 2 hours).
  • Stir together dry ingredients (flour, cocoa powder, and salt) in a small bowl. Add to butter mixture and beat until well combined. Wrap in plastic wrap and chill for 2 hours.
  • Preheat oven to 350 F. The original recipe says to lightly grease a cookie sheet, but we didn't bother.
  • In a small pot, melt caramels with whipping cream over low heat. Stir (milk burns quickly) until mixture is smooth. Set the pot aside.
  • Slightly beat egg white. Shape the dough into 1-inch balls. Roll the balls in egg white, and then in pecans. The egg white will make the pecans stick.
  • Place the balls of dough an inch or two apart (they spread!) on the cookie sheet. Use your thumb to make a dent on the top of each cookie.
  • Bake at 350 F for 10 minutes or until edges are firm. If the center indents disappeared while baking, redo them with your thumb (or a spoon if the cookie is hot). Spoon melted caramel mixture into the dents. Transfer cookies to wire racks to cool.
  • Drizzle with melted chocolate if you want to up the decadence factor. Enjoy!
Egg and vanilla added to the batter.

Pecans!

The caramel really spreads!
Store these in the fridge to keep the cookies from sticking together.

Creamsicle Cookies


We're all about the summertime flavors right now, if you haven't noticed. Remember running around as a kid with a sticky popsicle mess dripping down your hand? Maybe you ran through the sprinkler afterwards to rinse off. Or maybe it wasn't a popsicle. Maybe you were lucky enough to have a box of ice cream filled orange popsicles (creamsicles!) in your freezer...

This recipe comes from Baked Perfection, a blog with a ton of great tags, which makes it easy to search by ingredient or flavor. Apparently they were originally called "Orangebursts", but we like the frozen treat inspired name better.

Creamsicle Cookies
2 1/2 cups all purpose flour
3/4 teaspoon baking soda
1/2 teaspoon salt
1 cup butter, softened
1/2 cup sugar
1/2 cup brown sugar
1 egg
1 teaspoon vanilla extract
2 tablespoons orange zest (we put a tiny bit more in)
2 cups vanilla chips (we used white chocolate chips)
  • Mix together butter and sugars (make sure to firmly pack the brown sugar) until light and creamy. Beat in egg and vanilla.
  • In a separate bowl, stir together flour, baking soda, and salt. Gradually add this mixture to the butter and sugar bowl, mixing on low speed until just combined.
  • Stir in orange zest and chips (vanilla, white chocolate - whatever you decide!).
  • Drop rounded teaspoonfuls onto ungreased cookie sheets. They spread a little bit, so make sure to leave some room.
  • Bake in preheated 375 F oven for 8 - 10 minutes, or until light golden brown around the edges. Remove from oven but let cool on the cookie sheets for a few minutes (they'll continue to cook for a minute or two). Transfer to a wire rack to cool completely.
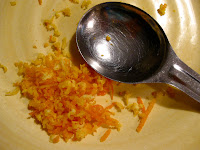
Check out the mini grater!

The orange will add a surprisingly strong flavor burst...
we did add a little extra.

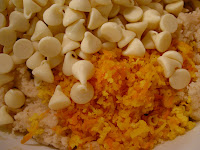
Mixing things up...

If you can find vanilla chips, please let us know how they are!
We used plain white chocolate chips and the end result was still delicious.

Lisa hard at work.

August 2, 2010

Pink Lemonade Cupcakes


Summertime and the living is easy. Pink lemonade in one hand, and a pink lemonade cupcake in the other. The tartness of the lemonade makes these refreshing.
Lisa is the expert icing queen - the two-tone was a fun effect to go for!
These cupcakes fluttered through Amy's workplace, and then we made another batch for a July birthday party.

The recipe comes from a very pretty blog, Sweet Tooth. The writer has a bunch of other great ideas too!

Pink Lemonade Cupcakes
1 box white cake mix
3/4 cup frozen pink lemonade concentrate
1/2 cup water
1/3 cup vegetable oil
4 egg whites
  • Combine all ingredients in medium-sized bowl. Mix on low speed for 30 seconds, then on medium for one minute.
  • Line muffin tins with 18 - 24 cupcake liners.
  • Divide the batter between cupcake liners. The original recipe says it makes 24, but we made 18 and the cupcakes seemed to be a good size. The liners should be about 2/3 full.
  • Bake cupcakes in 350 F oven for about 25 minutes. If you insert a toothpick, it should come out clean.
  • Cool cupcakes before adding icing.
Icing
3 cups confectioners (icing) sugar
1/2 cup butter, at room temperature
2 tablespoons frozen pink lemonade concentrate
Pinch of salt
Food coloring
  • Mix together all ingredients on low speed, until combined. Increase the mixer speed to medium or high, beating until desired consistency.
  • Divide frosting evenly between two bowls. Add food coloring.
  • We tried to follow this tutorial on two-tone frosting technique. Give it a shot. Alternatively, use our mom's technique! Put the icing in the fridge for a few minutes, so it's easier to manipulative. Roll equal amounts of each color into long tubes (a little bigger than gummy worms) and place side by side in an icing bag.
  • Add little straws or cocktail umbrellas for extra flair!
Plain white cake mix is the base.

Separating the yolk from the white.

Adding bright pink frozen lemonade.

Just wait... they're about to get much prettier.

Icing swirls.

This icing technique didn't work incredibly well for us,
but give it a shot! We basically did the same thing, minus the plastic.

Piping the two-tone icing onto the cooled cupcakes.